
 8/16/2010 08:20:00 PM
 Mark
Mark
As I said in my saltwater fly post, I'll be headed to Carolina Beach this weekend to try my hand at catching reds (and whatever else happens to be around) on the fly. Last night, I made myself a box in which to carry my creations.
Those of you who regularly tie and fish large flies have by now, no doubt, run into the problem of storing and managing those unruly clousers, double bunnies, and deceivers. If you throw them into a traditional compartment fly box, you have the issue of flies getting tangled, deformed, and matted. If you use a foam fly box, before long, those big hooks have ruined the foam, chewing it to shreds. A sly third option is the "slit foam" offered now by a number of different companies, but many of these boxes feature foam more suited to #14 hares ears and #18 caddis, not your size 1, 2x-heavy stainless salt hooks. Even if that foam could manage to hold the hook, and even if the box was big enough to enclose the 4" feather & bucktail monstrosities you fish, the foam itself would be deformed beyond recognition after one or two outings. Not shredded, but almost as useless.
Guys (and ladies) in this position probably, at some point, have seen the products offered by Cliff Outdoors, with their trademark slit foam, heavy plastic construction, and chunky, no-frills appearance. These things seem to be the go-to option for anyone with a need to carry a large variety of bulky meat chunks.
My biggest hangup with the Cliff boxes is the Catch-22 endemic to the situation: you need a big box to carry big flies. For most saltwater applications, you're fishing from the convenience of a boat, making the bigger boxes a perfect choice. For trout anglers, the "Days Worth" boxes really cover all your bases, but for the wading/shorebound bass & salt angler, who only needs big flies, your options are the Bugger Barn, and the Crab Shack. Both of which do their job great, but the Barn needs a back vest pouch or huge pocket, leaving the Crab shack as the sole box that is both pocket-sized and still able to contain a good number of massive flies.
Still, all of this meant nothing to me, the guy that waited till the week before to address his need for a box to take out into the flats.
Thus, I hit the local craft stores to try and kludge a crab shack of my own.
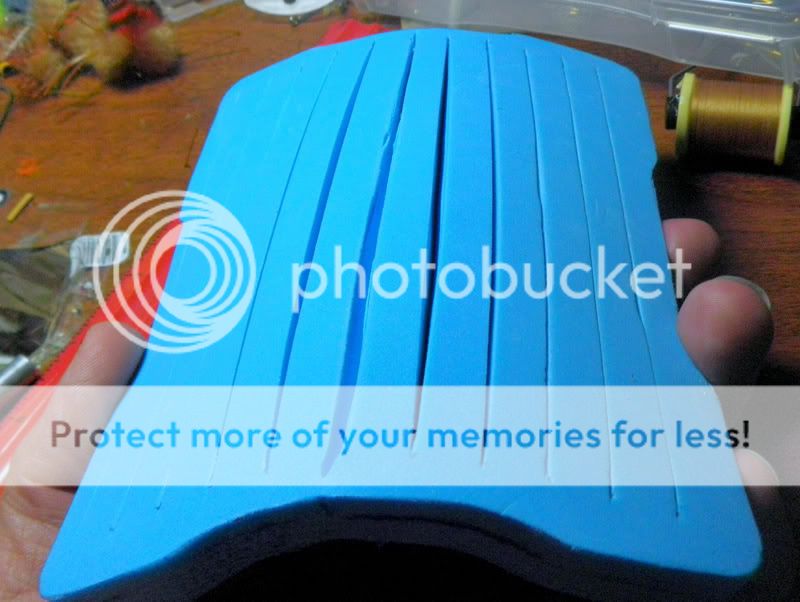
First off, take a look at this bad boy. Basically, you've got a heavy acrylic, hinged, single compartment box, with foam glued into each side that has slits cut at about 3/8" intervals. Nothing too crazy. Browsing the store, I had a hell of a time finding a "large, but pocket-sized single compartment plastic container", and had nearly resigned myself to cutting the dividers out of an organizer box when I stumbled across the display of clearance-priced "Photo Boxes". Bingo. Now for the foam.
I went to the foam aisle (yes, there is a foam aisle...frugal tiers already know this, right?) and to my dismay, the bulk sheets only come in 2mm and 6mm. The 6mm might be substantial enough for my purposes, but I didn't really want to have to depend on it. I considered sandwiching two pieces together with some glue, but I'm not really familiar enough with any glue to trust it to dry securely, cutably, and flexibly. Seemingly at an impasse, I paced a bit, hoping to find a hidden stack of 10 or 12mm foam...even a size 15 pair of flip-flops...
Eventually, I noticed the roughly 10" round discs of foam marketed as "bulletin boards". I don't know who decided that's what they were, but to me they were 10" disks of fly box insert. Grabbing one (in blue), I made my way to the checkout. Total damage: $4.22
At home I made a clearing in the undergrowth of my tying desk and got my kludge on. Almost too late, I decided to take a few pictures, to show any similarly minded anglers how it's done.
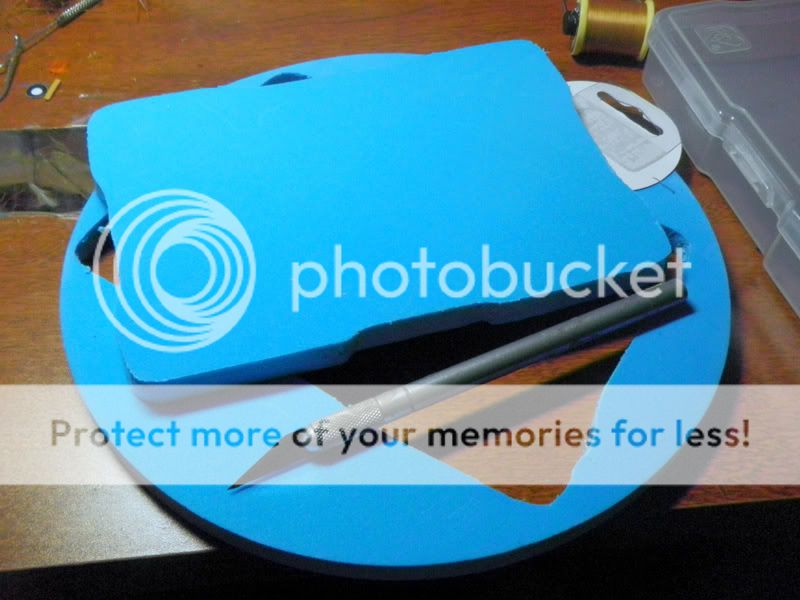
Here's what I got to start (and by extension what you'll need):
- Appropriately sized, single-compartment box...metal, plastic, wood, whatever you like, as long as it's single compartment and a nice size
- Craft foam...big enough to fully cover the internal compartment of the box. Obviously, get two if you want both halves foamed. For smaller streamers and flies up to, say...#4, the 6mm foam sheets should be sufficient. Anything bigger than that, you're going to want something a bit thicker, probably.
- An Xacto knife, with a sharp blade. A dull knife will work, but the rough edges will be noticeable. If you have no problem with that, go for it. The perfectionist in me wants the box to look nice when finished, so I threw a fresh blade in.
- A pen. The finer the tip the better. Also, while a ballpoint may be a bit more of a pain in the ass than a felt, it will also not make big blotches or smears on your foam.


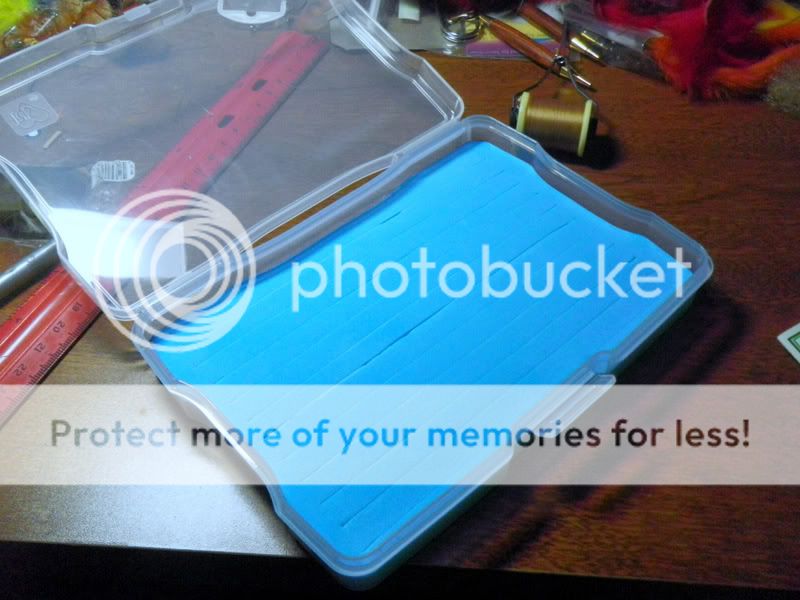
Now the hard part is done. Next, you'll want to put your foam in the box, slits up (obviously). This is where you'll see just how accurate you were when you cut out the outline. Do a dry fit first (to make sure it closes) then the real deal. Depending on how close you are, you will want to glue the foam down into the bottom of the box using head cement, zap-a-gap, or craft glue. I found that when I tried a dry fit to see how well the foam fit, it was so tight in there that I had trouble getting it back out. Rather than glue it, I saw how hard it was to get out and just left it press-fit in there. If it comes out later, I can always glue it.

Last is the best part: fill it up!


Feel free to add any special features you like at this point. I added a few Zerust tabs, glued inside the box, to inhibit corrosion of the hooks. If I could change one thing about this box, it'd be the closing mechanism. It isn't the most secure, but the foam should prevent any fly from escaping if it somehow manages to come open. Either way, for $4 bucks and change, its hard to beat. When I get back from the beach this will also make a great box to keep in the car for that random trip to a bass pond.

3 comments:
Just did a search for EVA foam and one of the things that popped up is "yoga" mats. They come is various thicknesses and colors. Might be a good $/SF solution.
Currently at Home Depot, you can pick up containers for storing drill bits and screwdriver bits from Dewalt for around $10 per, which includes the bits and the case (often in 2 or 3 packs). They make excellent cases for this project.
http://www.homedepot.ca/product/72-pc-drilling-driving-impact-ready-set/960200
doing the same thing for a year now. I bought the cases to keep them in..
Post a Comment