Thursday, March 18, 2010

It's on My Trout Fishing To-Do List...

Last season seemed to start slow and end prematurely in a blur.  Weather, delays, and excuses translated into time on the water lost in the early season.  Indeed, I went nearly fishless in the usualy good month of March in 2009.  Welcoming a new puppy to the house in August claimed most of the time I'd have otherwise spent fishing late-season isos and caddis.  I DID manage to make up for some of that time lost by getting to Erie for steelhead a few times more than I'd planned, but overall, I'd missed alot of my favorite fishing.

This year, I'm determined to do it right.

Rather than deciding where to go as I get in the car, I want to plan a few day trips, well in advance.  Whether I fish with my dad, a friend or two, or by myself, there are a few places I really want to fish this year.  There's other places that I wouldn't mind hitting on a random free Sunday, as well as places that I'm going to have to plan a few days off, but the majority of my "To-Do List" are single-day, or (in an ideal world) overnight camping adventures that should cost next-to-nothing aside from fuel.  I figure if I get one of these trips in per month, I'll be satisfied, with any additional trips as a bonus.  This season, my list is as follows (in no particular order)...

Oil Creek
Each year a group of friends meets up on Oil Creek for some May fly fishing.  Last year I missed it due to a combination of car trouble and the girlfriend wanting me to meet some of her family that was in from out of state. This year, that girl is in DC, and the car will be ready.  Should be a great time.  This is one that I'd like to overnight.  Heading up early Saturday, fishing, then camping and doing the meet on Sunday.

Little Juniata
I made my first trip to this famous water in early April last year, too early for the storied grannoms by literally a matter of days.  While my experience would have no doubt been different if there was a hatch on, that trip left me thoroughly unimpressed with the river.  My dad caught a few fish (on bait), but myself and my friend, wielding fly rods, didn't even get an interested look from any trout at all.  The river was somewhat high from normal, but the weather was great for bugs (overcast, slightly rainy, and cool), but I spent all day hiking, casting, untangling, and being generally miserable, without a single grab to show for it.

I'd like to get back to that water to have one more go at it, but I'll only go if I can hit the grannoms.  If I get a free weekend just before or just after the hatch, I'll pass.  For the guys that think its the creme de la creme...you can keep it.  My opinion may very well change after fishing the grannoms, in fact, I hope it does, but we'll just have to see about that.

Allegheny National Forest
A large undeveloped area full of woods, tiny streams and hungry native brookies?  Hell yes.

This is another place I wouldn't mind camping, and its a place I'd really like to bring my friend Josh along with me.  He first picked up a fly rod 2 Octobers ago, for the Erie tribs, but has had a pretty tough time of it since. While he gives it a good honest effort when he gets on the water, sometimes its like pulling teeth to get him on a trout stream (he's a topwater bass fisherman at heart).  To date, he only has one (quite small) fish on the fly, a 4-6" steelhead smolt that grabbed his glo-bug that was just hanging at the end of a tight line straight downstream of him while he was talking to me.

I think a dozen or so native brookies, while not much bigger, would do alot to convince him that this is fun...

...besides, if the ANF isn't the perfect place to use the 1wt I'm getting built, I don't know what is.

Presque Isle Bay
Over this past steelhead season, I made several friends in the Erie area, and if there's one thing they have in common, across the board, its that steelhead are far from the highlight of their year.  In fact, I think each and every one of them would have absolutely no problem with the steelhead program being cancelled in favor of enhancing the area's other fishing opportunities.

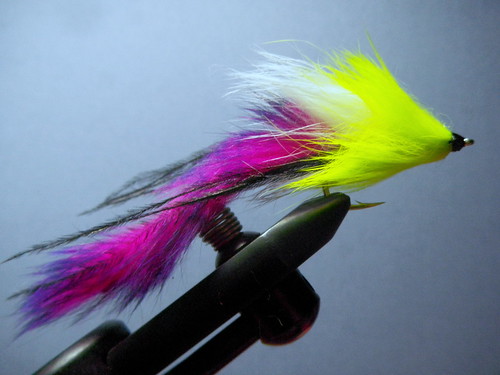
Specifically, a few of the Erians I befriended and fished with last fall told me I had to get up there in late spring, to fish the bay for largemouth, smallmouth, pike, and a variety of other interesting fish...such as the Thunderpumper.  While they primarily do this with casting and spinning gear, myself, and many of them want to really try fishing for these species with a fly rod this spring.  To that end, I've stocked up on big bass and saltwater hooks, bunny strips, and flash.

...and who wouldn't want to catch something called a thunderpumper?

Yough River
It's no secret: there's good fishing on the Yough.  From the lake and the outflow to the Mon, there's guys that love that river.  Trout, smallies...even walleye...in sizes and quantities to draw people to the river from the whole area.  I got there once last year, to meet my friend Jerry and his son for some smallie fishing, but the sun was high and hot, skies were clear, water was low and warm, and the fish, for their part, were largely content to ignore our streamers.  We each caught fish, mind you, but the effort vs fish caught favored the smallies, not us.

This year I'd like to hit a few different sections, and target trout and smallies alike.  This is a place that I can make a long afternoon/evening trip on a weekday after work, but it really deserves a weekend or two of effort.

Little Mahoning Creek
This was the site of my biggest catch of 2009, and while I dont expect a repeat, that memory alone is enough to warrant several return trips.  That catch, by the way, was this 18-20" tiger trout, that took an albino stone:

Oh yeah, we're going back.

Streams Without Names
Well, not strictly accurate...just about any ditch with a muddy bottom has a name in Pennsylvania, but there are hundreds...thousands...of tiny streams working their way through the woods of western Pennsylvania, many of them hosting their own respectable populations of feisty little wild trout.  Like ANF, this is the kind of water that makes for a great day with a 1wt.

This isn't so much of a one day streamhopping trout crawl (though that could be fun), but rather more of another to-do list in and of itself.  On days I can't fish, I plan to scour maps and find access points on remote streams in the area, and have several of them pre-loaded in the GPS, ready at a moment's notice.  Out of town for some sort of random task, and finding myself wishing I knew the area so that I could find a place to fish, I'd like to be able to tap the GPS and be able to find a random little stream that might well hold some nice trout.  This is the nice part of being a trout bum: knowing that even in that random situation, I'll have all the gear I need to properly fish anything from a 2 foot wide brookie ditch to a small river too deep to wade across.

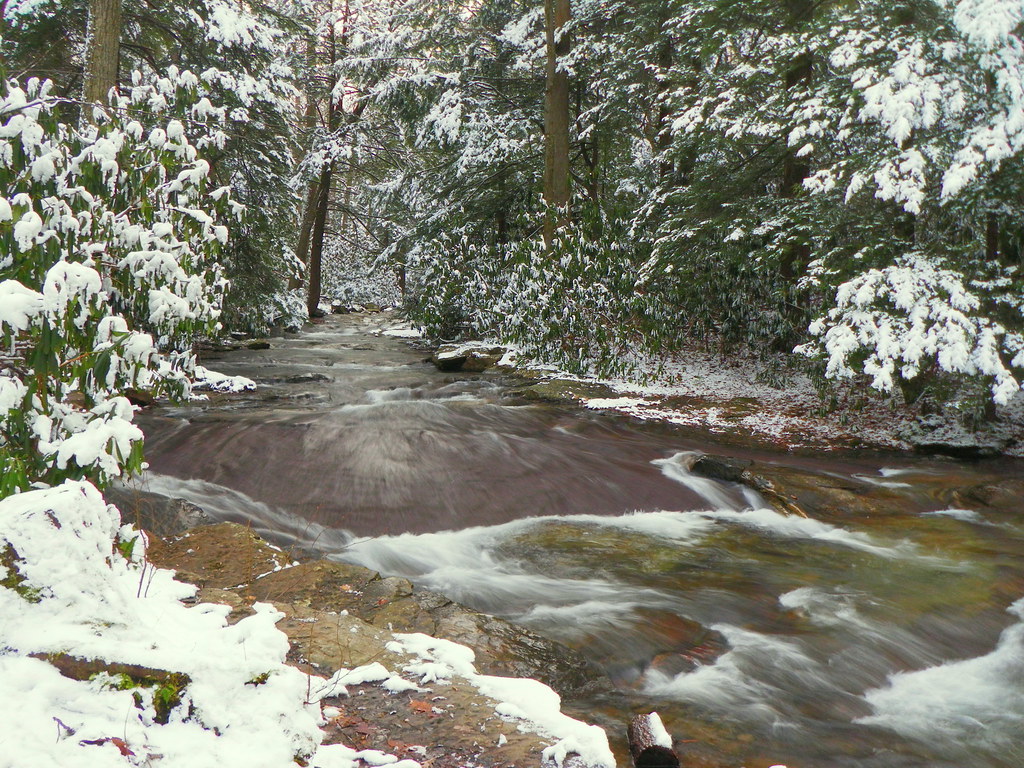
Kettle & Young Woman's Creeks
Last fall, I was in north central PA to fish brookie streams while my dad and a few friends went bear hunting.

We took a day to check out the larger streams, including these two, which were the most appealing.  Kettle creek, especially, looked to have a lot of great water.  This would almost certainly have to be an overnighter, but it would be very worth it.  The whole area is beautiful, the kind of place that makes you really slow down and appreciate being outside.

________________________________________________________________

Obviously, I've got plenty on the plate, and I won't be disappointed if I don't do it all, but through the year, I just hope I never miss an opportunity to fish due to not being prepared.  Let's hear about some destinations on readers' to-do lists!

Tuesday, March 9, 2010

Tying Small Flies: Tips for the Beginner

cp put up a great tutorial for a simple, small emerger yesterday, so naturally, I had to pick up a pack of #20 curved hooks on my way home and give it a try. While tying flies at this size isn't for the faint of heart, with some sensible thread and material management, it's a fairly straightforward process.

cp's fly fishing and fly tying: BWO Biot Emerger Tutorial

This emerger really stands out to me from so many other patterns designed for hooks of this size in that it really gets the most out of all aspects of the tie. That's not to say that a fly like the Zebra Midge won't catch fish (it certainly will), but cp's fly really manages to get a surprising amount of detail out of a relatively simple tie.

My advice concerning hook size for any beginner is to start large and work your way to smaller hooks, with any new technique. Learning to tie a parachute? Start with a big fly, maybe a #12 March Brown, then work your way down to the #18 and 20 BWOs once you've got the technique figured out. Eventually, however, you will get to that point, and its important that you understand what aspects of tying small flies are the same as those of tying big ones and what aspects are different.

While I'm far from a pro, I tie and fish small flies through much of mid-to-late summer here in Pennsylvania, mostly dries, but a few subsurface patterns as well.  I've found that my small flies look (and fish) better by making certain changes in my tying style to suit the smaller hook.

For the purposes of this article, when I say small flies, I'm talking about flies from #18 on down to #24 or so.  For my fishing, #16 is used too often for me to consider it an especially small fly, and the reason I stop at #24 is because I really don't fish anything much smaller than that with any sort of regularity.  So just understand that what I call a "small fly" is completely subjective, and may well be completely different than someone else's idea.  I do, however, think that most fly fishermen would agree that you could safely consider a fly small once you get down into the 20s.

That said, I feel that there's three aspects of tying that you really need to pay attention to with the small flies: thread, materials, and procedure.

Thread

As a beginner, this may be something you haven't really worried too much about until now, but the fact is, you simply don't have the room to use 3/0 on a #20.  These small hooks have a finite amount of shank space, and you need to be able to get everything attached to it...with room for a whip finish.

By this point in your tying, you should know that not all threads are created equal, both in terms of weight and structure.  You may have developed a preference for Uni, UTC, or Danville's Flat Waxed.  Regardless of your preference, you need to use the lightest thread you can when tying these small patterns.  For my tying, I use Uni 8/0 and UTC 70 denier.  I use these for most of my tying anyway, so it's not such a big transition for me, but many guys tie with 6/0 as their go-to thread, so its important to develop a somewhat lighter touch to avoid breaks.

Going hand in hand with the lighter thread and lighter touch is to trust your thread.  Don't think that just because you've dropped from 140 denier to 70 that you've got to use twice as many wraps.  That defeats the purpose of using the smaller thread.  Just downsize, and tie normally.

Materials


This isn't such a huge issue if you're only reproducing established patterns, but it becomes a significant factor when you're inventing your own.  Different materials have different thicknesses, textures, and properties.  No big news, you know this.  You might be a beginner, but you aren't clueless.  That's good, because the knowledge of materials you've gained thus far will help you decide what materials to include in that new nano-emerger you're inventing.

This comes into play more for natural materials than synthetics.  You can trim krystal flash as short as you like, you can thin down your antron yarn to just a few fibers.  What you cant do is trim down that partridge hackle to a size #24 and expect it to have the motion of a full feather.  To tie effective flies at this size, you should incorporate three approaches to dealing with materials: use materials that can be trimmed to size with no reduction in their effectiveness (usually synthetics), tie in materials in a way that lets you control size without trimming, or ignore standard sizing conventions.

Admittedly that last one has its limits, but let's be reasonable...if your soft hackle extends past the point of the hook, even past the back of the bend...we're talking minute fractions of an inch.  It really, truly isn't the end of the world.

As far as tying method, this consists of knowing your materials and what you can and can't do with them.  For example, I like a mallard flank fiber tail on emergers.  These fibers have a natural taper, and look really bad if you just tie in and trim to length.  Obviously, you just want to tie it so that only the tips extend out, but on the scale of a #20 hook, this is a tricky proposition.  Instead, try making a few soft loops around your fibers, then adjusting them to the proper length by pulling on the butts, then cinch down with a tight wrap or two, then trim the butt ends.

For a good idea of materials that perform well in small flies, the best thing to do is to look at recipes for other small patterns.  Things like thread bodies, mono, biots, krystal flash, antron, tiny bits of foam, and CDC are all popular choices.

Procedure

While closely related to thread and materials, there are a few subtle changes that you can make to your approach that may make life easier.  With respect to thread, make every wrap count.  By this, I mean each turn of your thread should have a purpose other than making the wrap before really secure.  Use only one or two wraps to tie in a new material.  If your wrapping technique is adequate, this is all you need, no matter the thread weight.  Don't make 5 wraps where 3 will do.

Another tip for thread, specifically unbonded thread like UTC is to periodically untwist your thread.  Flat thread will lay much flatter than when the filaments are tightly twisted.  Flatter thread means less bulk.

Get as much use out of every wrap that you can (seeing a trend here?).  If you need to tie in a tail, rib, and body at the bend, do it all at once.  2-3 wraps to tie in 2-3 materials is great thread economics.  2-3 wraps each for an antron tail, wire rib, and lace body means 6-9 wraps of fly-ruining bulk.

Likewise, when you're tying off your abdomen and moving into the thorax, hold your abdomen material with 2 wraps, then prepare your thorax, whether its a single strand of peacock herl, or a thin skin case, hackle, and  a floss base.  Get these materials stacked in the order you'll need them then place them along the shank.  Next, unwrap one of those 2 holding wraps, and tie in all of your thorax materials at once with 2-3 wraps.  All in all, you've just used 3-4 wraps to tie off your abdomen and start your thorax, as opposed to 2-3 for the abdomen, 2-3 for the case, and 2-3 for each thorax material.

Glue is your friend...if you know how to use it.  The key word here is sparingly.  A well-used drop of CA glue here and there can make a fly nearly indestructible, but in the wrong place it can make your fly worthless.  Always use a bodkin to apply glue to a small fly.  One good place to use it is to use your bodkin to spread a single drop all over the thread base of your abdomen, then wrap your body material over it, effectively cementing it into place.

Leave yourself a handle.  So you only need 3/4" of krystal flash for your body...instead of cutting just that much and trying to hold and wrap it using hackle pliers, why not just use the entire 6-8" strand, wrap comfortably with your hands, then trim off after you tie it down?  If you're like me, you'll be tying at least 6 of the pattern anyway, so you wont waste much of that strand, and what you do throw away is, to me, well worth the aggravation avoided.  If you're especially frugal, you probably have a "spare parts" bin on your desk somewhere that you can throw the spare flash into for possible future use.

Use a small whip-finish or half-hitch.  These aren't pike streamers, you don't have to tie them down like you're binding the great Cthulu to the ocean floor.  Give it a loop or two and be done with it.  Add a microscopic speck of head cement if it'll help you sleep at night, but no ten-wrap whip finishes.

___________________________________________________________

Well, that's about all I can think of right now.  I know several tiers with more experience and talent than me read this blog, so if you've got any tips to add, please comment!

Thursday, March 4, 2010

10 Tips to Improve Your Fly Fishing (& Tying) Photography

So you've been flipping through your favorite fly fishing magazine, gawking at the beautiful photos for years and you finally decided to take the plunge, get a new digital camera, and do this yourself.  You got yourself a modest camera and a memory card and for the first few months, it was fun taking pictures on your fishing trips.

Little by little, though, you started to see that all of your pictures looked more or less identical: a fish lying on the ground, or a buddy holding a fish, smiling.  While this certainly helped capture the memory of that day, you'd hoped it'd be more interesting than a series of the same shots with different backgrounds.  Little by little, you slowed down on taking pictures, to the point that you rarely even bring your camera with you anymore.  It's not that you don't like pictures, but, really, how many pictures of a fish in the mud does one guy need?

While this article may not make you the next Ansel Adams, hopefully it will stimulate some ideas and creativity on your end, as well as help to solve a few of the most common problems that plague many fisherman-photographers.

1. Be Ready


This is a seemingly small and obvious point that, really, plagues more fisherman than most other issues.  I'm not saying you have to cast with one hand and hold your camera in the other...or even wear your wrist-strap at all times, but keeping your camera in your jeans pocket...under your waders...is a surefire way to make photography such a pain in the butt that you probably wont take a single shot that day.  I usually keep my camera in the front pouch of my waders, in an inside pocket of my vest, or in an outside pocket of whatever jacket I may be wearing.  The point is that if retrieving the camera is a quick, hassle-free process, you'll be far more inclined to get it out and take some pictures.

2. Take lots of pictures


So you get back from a great day on the water, pop your memory card into the computer and check out the shots you've taken! ...both of them.  You've got a nice one of your buddy releasing that 20" rainbow, and one of that pretty waterfall you passed on your way in...but somehow, your shot of your friend is blurry, and the waterfall is very dark.  Leaving you, effectively, photoless.

The solution, obviously, is to take more pictures...but this works in two ways.  First, remember this is a digital camera, and film is free.  You can take as many pictures as you want, without spending one extra cent per shot.  With the 8GB card in my camera, I can get over 1500 shots with my 10MP image size.  This means that there's no downside in taking five or ten shots of that waterfall.  If the lighting isnt quite right, you can fool with the settings and shoot five or ten more.  No worries!  Adjust settings like exposure compensation, white balance, scene mode, and flash until you get something you like.

The other way digital photography helps you is that there's no downside in taking pictures of the smallest mundane thing that strikes your fancy.  Think that little red flower by the trail might be photo worthy?  It is.  Snap the shot (or five, or ten).  Worst case scenario: you DO manage to fill up your card.  No worries, cycle back through your images and delete a few that you can see right away don't make the cut (really, in 5-10 shots, there will be a few that you can tell right away aren't as good as a few of the others).  Gone are the days of having 20-30 exposures to capture everything.  You've got technology on your side.  Take advantage of it.

3. Post-process


Got a shot that would be great, but you held your camera at an angle?  No problem.  Straighten it out on the computer.  Got some blur on the edge of that shot where your finger was too close to the lens?  Crop it out.  Today's image editing software is user-friendly and readily accessible, with a short learning curve in many cases.  Don't think you have what it takes to be a digital darkroom whiz?  Think again.  There are several pieces of high-quality, easy-to-use, FREE image editing software available.  From web-based tweaks in something like Picnik, to a downloaded image organizer/editor like Picasa, it really is simple to brush up most photos just by dragging a crop box and adjusting a few sliders.  If you want to take your editing to the next level, take a look at GIMP, which many people compare to Photoshop.  All three of these utilities are completely free, by the way.

Tip: If you're afraid of ruining a great shot, just make a copy of the image file and hack-n-slash away at the copy, keeping your original in pristine condition.

4. Include People


Granted, this option is a tricky proposition if you fish alone.  But any time you're on the water among friends, take advantage of the situation.  Though it's probably not necessary with friends, it might be a good idea to let them know ahead of time that you plan to take pictures throughout the day, just in case any of them aren't comfortable with the idea.  Let them know that they don't have to stop, turn, and smile.  Its important for you to remember that the "hero shot", holding a fish up with a cheesy grin, isn't the only fishing picture to be had on the stream.  Snap pictures of friends casting, fighting fish, putting on waders, taking a break, laughing at a joke, lighting up a cigar...everything that makes a trip with friends memorable.  Take a look at this shot I took of my dad, fishing the Black Moshannon last fall.
Understand that we didn't catch one fish that day, but I got this picture and was really pleased with it, which is almost as good as a fish to some.

5. Mind Your Lighting


This can be a tricky concept for those who don't have more than a casual interest in photography, but lighting is really what will make or break a photo.  To make things worse, there are no hard and fast rules for lighting, other than the assurance that too much or too little will ruin the shot.

In simplest terms, for sunny, outdoor, daytime photography, the sun will provide all the light you need.  For acceptable lighting, put your back toward the sun, and on the subject, without casting a shadow on it and fire away.  This, however, leaves your subject squinting into the harsh light, and can often leave the picture looking bleached and washed out in shades of white.  The best way to alleviate this is to refer to to my second tip: take lots of pictures.  Try different angles and different locations, and remember what you did, what worked, and what didn't, for those times when you may not have the luxury of snapping as many shots as you like.

Contrary to what you might think, you don't want bright, intense, even sunlight for the best pictures.  Rather, concentrate on the "golden hours", those being the hour after dawn, and the hour before dusk, for great sunlight for photography.  These times give you vibrant, non-blinding light, at an angle that is easy to work with for great pictures.  This light will also be great for getting the colors in your photo to really "pop".

On the flip side, you won't have sunlight as an option when taking photos of your recent ties at the bench.  For tying photography, your lighting will depend, nearly completely, on artificial lighting sources.  In this situation, the best advice I can offer is that if you think you have enough light, you almost assuredly don't.  One standard incandescent desk lamp plus the lighting fixture that lights the room is not enough.  Fluorescent lighting provides more even, penetrating lighting, but even at that, the tube must be close to the subject, within inches, not feet, of the vise.  The best solution is a nice, bright halogen or fluorescent desk lamp, or better, a pair of them, as well as some sort of "photo studio" for your flies, that gathers, but diffuses the harsh, close lighting.  A few (inexpensive!) examples of this are as follows:

DIY Macro Photo Studio
Light Box/Light Tent
Fly Studio

For my tying, I simply don't have the room to construct any of these (yet).  I just snap my shots right there at the vise, though I do use a full spectrum Ott light to provide bright, even lighting, as well as a sheet of blue craft paper for a background.  This background will help your fly stand out as well as eliminating background distractions for both your audience and your camera's autofocus.  Just be sure to choose a color that isn't even close to any of the colors on your fly.  Blue is a great choice for the majority of flies, and at less than 30 cents per sheet, picking up a few colors isn't going to drain your account.  Here's a few shots of flies at my vise:


As you can see, with the bright even lighting and simple background, my photos are well-exposed, with good color, if not exceptional, standout examples of macro photography.  The same sheet is used as the background for all of these, so, really, I could have been somewhat more consistent in my color and brightness, but for my purposes, each of these flies is, in my opinion, well represented in the photo.  The issue of color representation brings up my next point...

6. White-Balance, Use It


What is white-balance?  Simply put, it's defining what, exactly, your camera thinks is white.  While this may seem insignificant (white is white, after all), when you realize that your eyes constantly adjust white balance for your brain, and that your camera uses this setting to determine every other color, it becomes a bit more relevant.

Most, if not all cameras have an Auto setting for white balance, which usually works great outside.  Afterall, sunlight is full spectrum, complete, natural lighting that brings out the color the camera recognizes as white in object that are, as your eye sees them, white.  The problem arises when you walk inside, into a world where light is provided by really hot pieces of metal and ionized gases.  You may think nothing's changed, but again, your eyes and brain have taken care of that for you subconsciously.  Ever see those pictures where everyone and everything in the room has an orange cast to it?  That's an improperly adjusted white balance.  See, lightbulbs give off light that is "warmer", or more red, than sunlight.  Meaning that, without adjustment, your camera will duly note that everything in the room has the same cast of red.  Likewise, fluorescent tubes have a bluish cast on their light, which is said to be "cool".

Luckily, adjusting for this is easy with a digital camera.  Just find the white-balance setting on your camera, and adjust it until the image on your LCD screen has colors that look the most like what your eyes are seeing. Most cameras will have "AWB", or auto-white balance, as well as a few handy pre-sets for daylight, shade, tungsten (incandescent bulbs), and fluorescent.  Many cameras also have a custom option.  My Pentax Optio WS80 has this option, and I use it all the time.  To use it with my camera, I simply select the custom option, and it gives me a box in the screen that I simply point at something white, and press the shutter release as if taking a picture.  This, to the camera, points at that object (a piece of paper, usually...or snow), and says, "This...this is white.  Make this white.", and adjusts all other colors accordingly.  For my use, this option has been nearly flawless.

Bottom line: learn to use the white-balance adjustments on your camera.  You will be glad you did.

7. Use Macro


This is something so simple that it should really go without saying, but it's surprising how many people don't do it.  Simply put, when taking pictures of small objects, the image your camera makes of the object will often be larger than the object itself.  This is macro photography.  And when you're doing this, you should use the setting for it.

Usually denoted with the symbol of a flower, macro is a setting most often encountered on point & shoot cameras as a scene mode or a focus option.  Either way, when taking pictures of small objects, you need to switch to it.  This includes, obviously, flies in the vise.  It also includes flies (the natural ones) that land on your rod, close-ups of your sweet new reel, very small fish, like native trout, close-ups of large fish, and that nasty poison ivy rash your buddy got all over his...well...actually, don't take a picture of that.

This setting tells your camera that the object is tiny and that the object is very close to the lens, and it adjusts accordingly.  Help your camera help you.  Use macro.

8. Don't Move!


Again, this seems obvious, but under the surface, it is responsible for more bad camera reviews than any sort of mechanical deficiency.  When you press the shutter release, the shutter releases (shocking, I know), and for the briefest of moments (less than 1/50 of a second) the image sensor in the camera is exposed to the light coming through the lens (hence the term 'exposure').  The image sensor takes the light that is coming in, in that instant, and adjusts the pixels of color accordingly to produce the image you see on your screen a few seconds later.  The trick is getting enough light to the sensor for it to, well, make sense, of what it's seeing.  A camera does this in one of three ways:

1. Make the hole bigger.  This is also known as opening the aperture.  While this is a great method, the aperture can only open so far.

2. Make the sensor more sensitive.  Increasing the ISO setting of the camera will make the sensor more sensitive to the light that is coming in.  Unfortunately, the higher the ISO, the worse the image, which is why night scenes often appear horribly grainy.  It doesn't take too much of this "noise" to ruin an otherwise great shot, though, so you really want to keep the ISO as low as possible.

3. Keep the hole open longer, to let more light in.  This is the option the camera likes to use when it can, as a slower shutter speed won't (necessarily) degrade the image at all.  That is, there is nothing in the technology of the camera that makes this a bad option.  Unfortunately, the source of the crappy image in this case is (usually) what's behind the camera.  You.

See, the trouble with a slow shutter speed is movement.  Its like taking a still shot from a movie and choosing one small speck on the screen and saying "that speck is blue".  Now, watch that speck for the whole movie, then tell me what color that speck was for the whole movie.  Obviously it changes and there's not one correct answer.  Essentially, you're asking your camera to do this, and its frustrated answer is a horribly blurred image.  There's 2 movements that cause this: your subject, and you.  The first, you can't do much about, and that's why sports photographers (who take pictures of distant, fast-moving subjects in poor artificial lighting), don't show up to the game with Kodak Easy Shares.  No, they have big name Canon and Nikon lenses as long as your arm that could be traded straight-up for a car.  No lie.

So for low-light STILL shots, you're limited to using your flash on close subjects (usually flash has a range of about 15 feet or so, tops) and risk blowing out the image in a wash of harsh white lighting (which lets your camera speed up that shutter), or ensure that there's no movement of the camera at all.

I do this with a 2-tactic approach.

First, use a tripod.  I know it sounds ridiculous, but it helps.  Greatly.  Now I'm not saying you should take a 4 foot tripod fishing with you, but for images of your flies, if the whole image is turning out blurry, a tripod will definitely help you immensely.  They're not that expensive, either.

Second, I found that even with a tripod, just the disturbance of my finger pressing the shutter release was jostling the camera enough to fuzz the image, so I use the 2 second timer to give me time to press the release and back away, for a truly motion-free shot, which is essential in low light, or capturing the motion of flowing water, like this.

9. Move


In contrast to the technical recommendation that you not move while shooting the picture comes the artistic recommendation that you DO move before pressing the shutter release.  Look at your fishing photos...remove all pictures taken from your average standing height, those taken standing on the bank or in the stream, and those taken while crouching or kneeling, looking down at some subject in front of you.  What are you left with?  Not many pictures, I'd suspect.

This doesn't mean you shouldn't take those pictures, but I'm encouraging you to also take shots from odd angles, vantage points high and low, and all points in between.  Instead of 'fish lying on bank', take a shot from just behind the fish as he's being released, halfway in the water.  Instead of the hero shot, get close to your buddy and take a low-angle shot, looking up as he's fighting the fish.

10. Experiment


Perhaps the nicest thing about the advent of digital photography is that there is no penalty for a botched shot...or even a dozen, or a hundred.  You can experiment as wildly as you like without it costing you one cent.  Try to figure out how to get that shot of your wife, in silhouette, fishing at sunset, with her reflection, an identical silhouette, in the water.  Try your continuous shooting option to make a triptych of an emerging sulphur.  Try breaking all the rules and taking a crooked, blurry shot of a big fish on the line, jumping out of the water that conveys the intensity and rush of the fight!  The most important word here is TRY.  There is absolutely no consequence for coming home and deleting all of your experimental shots because they didn't turn out as you hoped (you'll have plenty of others, because you're taking lots of pictures...right?).  If you got really close to your intended effect but missed slightly, see if you can't touch it up in Picasa.  Try taking a look at some of your pictures in black and white, or sepia, or oversaturated, or faded, etc.

There's no limit to your creativity other than the limits you place.  So next time you go fishing, or tying...bring a camera...and put it in an easy-to-reach location.

Wednesday, March 3, 2010

Winter Nymph: A Simple, Productive Fly

I finally got out to fish for the second time this year on Sunday, being forced to park at a restaurant and walk to the stream from there.  Managed to land my second fish of the year, too: a decent 12-14" rainbow on this simple, no-name nymph.

This is one of those great flies that is everything and nothing, endlessly customizable, that can be tied with all the bells and whistles, as I've done in this tutorial, or stripped to next to nothing when you lose your fly box on the first day of the trip, and need a few dozen flies to fish tomorrow morning.  Without further ado, the tutorial:

Simple Nymph
Hook: Any standard or slightly long nymph or dry fly hook.  Really, just about any hook.  Dai-riki 730, #16 shown
Thread: Again, any thread would work.  Black Uni 8/0 used here.
Tail: Pheasant (optional)
Rib: Silver Oval Tinsel (or wire, or mono, or not...also optional, but encouraged for durability)
Back: Pearl Mirage Tinsel (or scud back, or thin skin, etc. ...also optional, but should be used)
Weight: .025 Lead
Body: Blend of dubbing (pink spectrablend, and gray-green scintilla), in a loop
Head: Black dubbing

Place the hook in the vise.

Tie in the tail, extending about a shank-length or less, over the bend.
Tie in the rib and the back (in that order), over the tail.  Use enough material to get the job done, and remember: you can always trim excess, but you can never add more at the very end.
Wrap heavy lead wire along the shank, adding bulk and weight.
Using a blend of your preferred dubbing, dub the body using the dubbing loop technique for a full, buggy body.  In this case, I'm using pink Spectrablend and gray-green Scintilla, which gives the attraction of hot pink with the subdued, transluscent effect of the scintilla.  Experiment with your own natural and synthetic dubbings.


To begin, make a slack loop 3-4" long, and tie it off so that it wont slip.
Place a small amount of dubbing along the length of the inside of the loop.
Twist the loop until it binds the dubbing tightly into a sort of rope.
Wrap this rope around the hook to apply the dubbing.
Pull the tinsel up over the back of the fly and tie off near the eye.
Wrap the ribbing forward to provide durability and segmentation, then tie off near the eye.
Dub a head of black dubbing.  Whip finish and trim.

The options for this fly are endless...want to make a green and orange fly, with a tail of hackle fibers, red tinsel rib, and swiss straw back?  Go for it.  I tend to tie these in bright colors this time of year, dark brown, gray, and black in the early spring, all sorts of light shades in the summer, and cream in the fall.  The trout I took on Sunday ate a pink fly like the one pictured, but with gold wire ribbing, no tail, and no head.  Just lead, dubbing, back, ribbing.  Like I said, pretty much everything on it is optional...so make it your own and catch some fish!

Monday, March 1, 2010

Hackle: What Kind Should I Use?

Neck hackle, saddle hackle, hen hackle, cock hackle, spade hackle...for the fly tying beginner, all these variations on what are essentially the same feather can be very confusing.  Add to that the variation in quality, and suitability for certain flies, not to mention grading, and you've got a real mess.  In this article, I'll explain some of the key differences in these feathers.

FUNCTIONALITY

The most important factor when determining the correct hackle for your fly is the function that hackle will serve.  The most obvious and important role of hackle is the role they play in a hackled dry fly, where the hackle keeps the fly floating.  In these flies, the stiff, webless hackle barbs float the fly thanks to the surface tension of the water.  This application requires dry fly specific hackle.  Dry fly hackle comes in both necks and saddles (the difference will be discussed later), and it's made by several companies including (but not limited to) Whiting, Metz, and Keough.  With a few exotic exceptions, they also tend to be the most expensive hackles as well.  Just be sure that the hackle you're purchasing for dries is specifically labelled as dry fly hackle.  Expect to pay in excess of $25-30 for a quality dry fly neck or saddle.

Also of use in dry flies are the hackle fibers used as tailing material.  For this purpose, a tier can use spade hackle, which are the long fibered hackle feathers near the edges of some necks, or Coq de Leon, the hackle of a particular breed of rooster originally bred in Spain.  These feathers have exceptionally long, stiff fibers, which make excellent hackle.  For my dry fly tailing, I use a Whiting Tailing Pack, which is Coq de Leon.

Other than dry fly hackle, there are a wide variety of other hackles, all used for subsurface patterns.  This includes hen hackle, and the cheaper, strung cock hackle.  These hackles are used for everything from woolly buggers, to nymphs, to soft-hackle patterns.  In addition, several other birds have feathers suitable for nymph and streamer hackle as well.  Ducks like the mallard, teal, and wigeon, and upland game birds like partridge, grouse, woodcock, and quail, all have hackles that look great on nymphs, wet flies, and streamers.  These feathers, however are generally not referred to as hackle, the term being reserved for hen and rooster feathers.  Once you decide what type of fly you want to tie, you can then decide on a type of feather.

NECK OR SADDLE?

This seems to be a pretty common question among new tiers and really, it's not as big of an issue as one might think.  

First of all, understand that a neck is a cape and vice versa.  The two terms may be used interchangeably.  Necks are the feathers from the front of the bird, while the saddle is located across its back.  The two main differences are length and taper.  Neck feathers tend to be shorter and have a more pronounced taper while saddles tend to be a longer feather that maintains its barb size across the majority of its length.  Pictured below is a pink strung neck hackle from a rooster.  This is inexpensive hackle suitable for flies like streamers and woolly buggers:


The following picture shows a white saddle hackle from an inexpensive saddle.  These feathers are fairly webby and not suitable for dry flies.  The longer stem length makes this feather (and other saddle feathers) a great choice for flies where its necessary to palmer the hackle along the length of the body.  These feather provide enough length to palmer an entire body without having to deal with the thick, difficult-to-tie stem at the base of the feather.


On both of these feathers, you'll note the fluffy fibers at the base of the feather.  While these fibers may be used as nymph tailing or some similar use, they aren't the fibers you want to be using for most applications of hackle, and I discard them.

An important difference between necks and saddles becomes extremely relevant when it comes to dry fly necks and saddles: necks have feathers to tie a wide variety of dry flies, saddles, not so much.  What I mean, is that in dry flies, the length of the feather barbs or fibers is very important, as it affects how the fly sits in the water.  Thus the feather barbs determine what size of dry can be tied with that feather.

Necks, as I said, have a wide variety of feathers and can easily tie flies from a huge (for dries) size 8 or 10, all the way down to 22 if not smaller.  The disadvantage to this is that all that variety comes with the tradeoff of shorter, more tapered feathers, thus, less usable hackle on each feather.  You will almost assuredly only get one fly per feather, and may well have to use multiple neck feathers for especially heavy-hackled flies.  The stems of these feathers also tend to become thick, and difficult to work with when you get close to their base.

Saddles, on the other hand, feature almost no taper, and uniformly fine stems along the entire usable portion, making them very tier-friendly.  You will easily get 3-5 if not more flies from every saddle feather.  These conveniences come with a trade-off in versatility, however, as any given saddle will only tie 2-4 sizes of fly.  For example, I have a Whiting Dun saddle at home that will only tie #14-16, and I had to grab an extra half-saddle, just to get a decent number of #12 feathers.  Likewise, for my tiny fly needs, I had to get a seperate, specialized midge saddle, with feathers from 18-22...if I really hunt, there's a few 24s in there too, but that's about the extent of it.

For my tying, I much prefer saddles, but for every kindred spirit that ties with saddles, there's someone else that loves using only necks...and probably 3 or 4 people who use both.  Its all a matter of preference.

HEN OR ROOSTER?

The last common question about hackle is whether someone should buy hen or rooster.  The answer, of course, is 'it depends'.  It depends on what type of fly is being tied as well as what the hackle is intended to do.  Some recipes will clearly specify hen hackle or rooster hackle, but many will just say "hackle".  For these situations, you need to determine if the hackle should be fairly rigid or wispy and flowing.  If the former, use rooster hackle, if the latter, try hen.  In nymph and wet fly tails, for example, a clump of hackle fibers is often necessary.  In this application, use a clump of fibers stripped from a rooster neck hackle (for their rigidity, and length.  The longer neck hackle fibers will be easier to manage in tying).  Likewise, many wet flies incorporate a hackle collar that will impart motion to the fly as it glides through the water.  For this purpose, try a hen hackle.

Any other tips, tricks or suggestions relating to hackle?  Leave them in the comments, and I'll add it to the article!

Twitter Delicious Facebook Digg Stumbleupon Favorites More

 
Top Web Hosting | manhattan lasik | websites for accountants